Category Archives: homemade

Buttercup Purse

I love this purse!

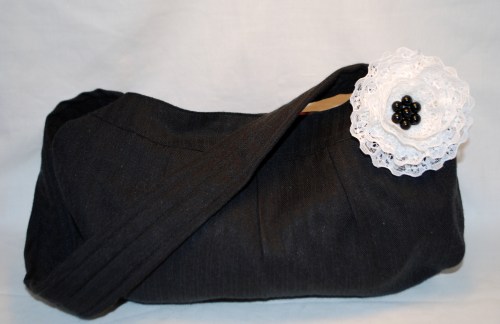
When I saw the pattern for Made By Rae’s Buttercup Purse I just knew I needed to make it!  I had a never worn Man’s black dress shirt that I found at the local thrift shop and had to buy because the fabric felt so nice and I thought it would be perfect for my little sister for Christmas.  Instead of permanently attaching the flower I thought it would be fun to make her a bunch of different flowers that she could pin to the bag to change up the look.  And  I made the pins so the pin  could be slid out and the flower coudl be put on a headband or a hair clip instead.

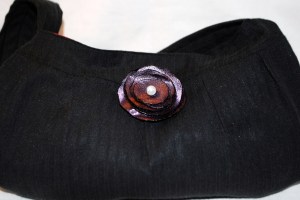
So… she can make her purse cute with the white lace flower or she can change it up and make it look like this…

or thisor thisor my personal favourite…I hope she enjoys it as much as I  liked playing with it!  Okay, she better like it or she needs to mail it back, tee hee.  Guess what I’m making myself in the new year?

Christmas Cookies

It seems to have become a Christmas tradition that the children take decorated sugar cookies into school for their classmates and friends on the last day of school before winter break.  Today was Cecily’s Christmas party at preschool so we made decorated trees for her to take in. I baked the cookies a couple days ago and yesterday I iced them and she added the little candy balls.  No pictures of the actual creation – two little girls, cookies and tons of icing isn’t really condusive to snapping pictures.

I ran into a problem when I realized one of the boys in Cecily’sPreschool is allergic to peanuts and eggs.  There’s eggs in the cookies and we can’t guarantee no peanuts so I needed to come up with something to give to him.  That’s when I came up with a cute solution.

A felt cookie that looks pretty close to it’s edible counterparts. I added a hanger just in case he wanted to use it as an ornament.

And here are the two together all packaged up.  I hope all the kids liked them.  They’re super duper yummy!

Mr. Owl 1.0

Being the unorganized person that I am I remembered Cecily needed a backpack for Preschool, oh, 14 hours before she needed it. So at 9 pm after spending an hour scouring the house for something I could plausibly pass off as a backpack I relented and decided to just sew one for her. Yup, at 9PM I STARTED sewing a backpack that was needed for the following morning at 10AM.
Now, I could have just designed and drafted something simple but being not the brightest bulb in the box I thought an owl would be cute.
Some things I learned while making Mr. Owl are
1… there really is a difference between heat n bond lite and and regular heat and bond. If you try to sew through regular heat and bond not only will you end up with huge needle holes that look horrendous but it also gums up your needle and the bobbin cover.
2…if you heat up heat and bond for one second too long it won’t adhere properly and you’re pretty much screwed if you don’t notice before you iron it onto your finsihed product.
3…when you draw up a pattern when you’re exhausted it’s probably a good idea to write down what you used for your seam allowance so you actually use that seam allowance when sewing it. Ya…things don’t line up without the right seam allowance, lol.
4…when cutting your pattern don’t forget to mark where the MIDDLE of everything is so you can line those marks up later. Eyeballing will lead to yout straps being put on lopsided and just looking silly.
5…don’t try and draft and sew a finished pattern 13 hours before you need the thing. This is especially important when you’re already exhausted and h ave a kid who wakes up every 2 hours.
Fortunately, the only one who seems to have noticed all these little shortcomings in Mr. Owl is me. Cecily loves him and is perfectly happy to walk proudly into preschool with her lopsided, peeling faced owl backpack. I think his matching friend Little Owl makes him even cooler in the eyes of a four year old.
Maybe after Christmas I’ll get going on Owl 2.0 and get him a little closer to perfect. By then I may have also learned how to turn my patterns into a PDF to share with everyone because what’s the fun of creating things if you don’t get to give them away, right?

I think he’s the perfect friend for running around with…wouldn’t you agree?

Teacher’s Gifts 2010

One night while searching the internet for new and unusual teacher gift ideas I happened upon this wonderful blog

and thought this idea was wonderful!

While it’s too late  to make one for this year I thought I’d share how I made mine.

First I went to the local thrift store and picked up 2 frames. You could go to a “real” store but why when you can reuse something that will look just as good? If they’re ugly, like mine were, you can easily give them a quick sanding and paint them. And it appears at No Frills last week Delissio pizzas were on sale!

While waiting for the paint to dry I went and typed up the words to the quote. I used fabric because it was what I had around the house but it would be MUCH easier if you had paper. Tomorrow I’ll tell you an easy way to print onto fabric using an inkjet printer. It is pretty neat. And that would be Cecily’s finger…she was determined to get into a photo one way or another.

the picture would look great just as it is but I wanted a matting so I took freezer paper cut to the size of the frame, ironed it to the back of a piece of fabric and measured in an inch from each side. Then very carefully I used my Xacto knife to cut around the inner lines to get this…

A fabric Mat! Now I put double sided tape along the inside edges of the matting and very carefully put it on the main picture.

Of course, in my haste to get these done before 1 AM I forgot to get a picture before I stuck the sticks on. I tried double sided tape for the sticks but it didn’t work. Eventually I settled on using my favourite fabric glue. It’s latex based and adheres most things together almost instantly. I’m sure almost any glue that adheres fabric and porous solid objects would work.

This is the glue I used…

sorry about the very squishy picture…

Now, because this frame wasn’t a shadowbox frame and I now needed it to be I needed to make some spacers to take up the space between the glass and the picture. I decided .5 of an inch would work and cut strips of foam core board that wide. To figure out how long they needed to be I first measured how long the two side pieces needed to be, inserted them and then measured how long the other 2 pieces needed to be to fit between the first two pieces. (clear as mud? It’ll make sense when you do it, promise) After figuring out the lengths I put double sided tape on one side.

and stuck them to the wrong side of a piece of fabric (Make sure you iron the fabric first) and using my rotary cutter cut along the edge of the foamcore so I ended up with this…

Now, clean the glass from your frame till it’s streak and fingerprint free and insert it into your frame. Insert your foam spacers on top of the glass and then insert your super cool quote and the backing cardboard (I’m sure it has a name but I have no idea what it would be).

If you saved the little staples or nails that held the backing in you can use those again to hold in the picture or you can use staples or small nails to hold it in. And as a finishing professional touch I glued brown craft paper to the back of the frame before I screwed the hanger back on. (sorry, no pics of the back I was too giddy that I was almost done)
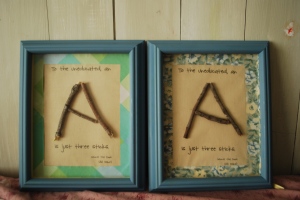
When you’re all done you’ll end up with this. Pretty cute, huh? I hope the girls’ teachers liked them. I think I’ll head back to the thrift store and pick up another frame to make one for the living room!

Bean Bag Book Ends

My oldest, Lily, has books piled everywhere in her room. On the floors, on her bed, in her closet, on the dresser and 4 shelves on her wall. I asked myself why and when I couldn’t come up with answer I asked her. Apparently books are only meant to stand upright on shelves and not horizontal so she left the shelves empty.

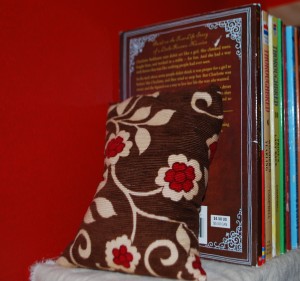
In order to remedy this messy situation I let her pick out some fabric from “the stash” aka the piles and piles of fabric I have everywhere and I wipped up these

All they are is a rectangle of fabric sewn along 3 sides, filled with rice and slip stitched closed. They do a great job holding up her books and have the added benefit of being perfect for throwing at her sisters when they decide to intrude on her sanctuary (and are much softer than the books she was previously using)

Ruby in her Retro Dress

This week I’ve been working on getting my craft room moved upstairs from the basement into what used to be our Den.  My apologies to my husband who just had his computer moved into the living room – sorry Hun but it was for the greater good. 

So this week I only worked on getting a bunch of burlap sewn into recycling bags and on this cute retro pillow case dress.  I’m personally in love with it and so is Ruby.

I’m pretty sure you can only get away with wearing this fabric until you’re three but it looks adorable on my little Goober.  Okay, maybe I’m biased…

They’re the simplest dresses in the world to make and they’re great for running…

and running…

and even chillaxin’ on the slide…

I’ve got about 20 more pillowcases waiting to be turned into dresses and nighties (ya, my 10 and 7 year old informed me they won’t be caught dead outside of the house in a pillowcase dress – their loss!) so that’s my plan this week.  Pillowcase dresses for everyone!

Making Memories


I have a confession to make – my four year old doesn’t know her numbers as well as she should. She can count to 20 but ask her to identify the numbers and she has no clue. Yes, I am Mother of the year!

So, to help remedy the situation I thought a memory game was in order. A memory game she made with her own little hands.  Since I have about 60 lids from concentrated juice kicking around in the drawer I thought we’d use those to make some virtually indestructable “cards” since the napping 2 year old has a tendency to eat anything we don’t nail to the floor.

So, we got our juice lids and some lovely wrapping paper saved from recent birthdays, and printed out our letters and numbers on card stock I had laying around. After completeing number 1 and 2 I decided we’d start with numbers 1-5 or we’d be making memory cards till Cecily’s in University. We’ll save the rest for another day when we need something to fill in nap time.

What we did is cut out a circle using a scrap if card stock and used it as a template to cut out 10 circles from the wrapping paper. I then used my handy dandy square punch to cut out the numbers. Then I got to sit patiently (they tell me it’s a virtue) and watch Cec paint the outside of each lid with glue, glue the circle on, painstakingly cover every square millimeter of the number and slap it in top of the paper. Voilà! 1.5 hours later we had our very own indestructible memory game!

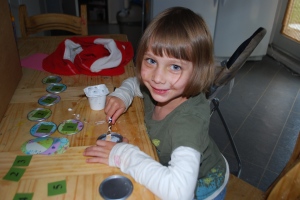
Here’s my pretty little thing with her new game. And sadly that’s not marker. She had an unfortunate altercation with the floor a week ago and the floor won. A concussion, ER trip and xrays later she’s healing great but still looks a mess.